Skip to product information
1 of 7

ROAR Leopard Print Nail Wrap Kit

ROAR Leopard Print Nail Wrap Kit

Regular price $12.00 USD
Regular price Sale price $12.00 USD
Sale Sold out
Shipping calculated at checkout.
Packaging and Shipping Options

Starter Kit Includes:

Shopping for a gift? First time using wraps?
Choose this!

โ€ข Set of 20 nail strips in branded packaging
โ€ข Nail file
โ€ข Orange Stick
โ€ข Cleansing Wipe
Ships via parcel mail in a rigid mailer.

Refresh Kit Includes:

Already a nail-wrap wizard?
Choose this!

โ€ข Set of 20 nail strips (no packaging)
โ€ข Cleansing Wipe
Ships via lettermail in an envelope.

Outta the way, Tarzan! Thereโ€™s a new Queen of the Jungle. Plain black gel nail wraps alternate with a classic leopard print in our wildly wonderful ROAR nail wrap kit. Fierce, flirty, and fashionable, were commend getting out those kitten heels for this wildcat nail art. Each starter kit includes: 1 set of 20 double-ended nail strips 1 cleansing wipe 1 orange stick 1 nail file How to Apply: for more tips and tricks visit modgloss.com/tips +++ Prep: 1. Wash hands thoroughly with soap and water. 2. Clip and file nails - but not too short! A little length will made filing off the excess wrap easier. After a few days of wear you can trim and file you nails with the wraps still on. This also helps to refresh your manicure by removing any wear on the tip of your nails. 3. Do not buff the surface of your nails. This is unnecessary and may cause the wrap adhesive to stick too strongly and cause damage during removal. 4. Push back cuticles. Never apply the wraps on top of your cuticles, they will peel off. 5. Cleanse surface of nails with an alcohol wipe to remove any oils. Oils will interfere with the ability of the wraps to properly adhere and create a long-lasting bond. +++ Application: 1. Pick Choose a size just slightly smaller than your nail. 2. Peel Peel from backing paper taking care to touch the adhesive as little as possible. 3. Press Place on your nail, smooth out, and fold over edge of nail, pressing firmly. 4. File 1. File off the excess in a straight downward motion 5. Press again! Press firmly a second time to fully adhere every square millimeter of that art. 6. Top Optional: apply a quality, slow-drying top coat. See more info on this below. 7. Let it be, beautiful. After application it is best to wait a couple hours before washing hands to allow for the adhesive to cure completely. A great tip for this is to apply your wraps immediately before bed - and wake up ready for your day with a gorgeous manicure! +++ Removal When you are ready to change it up remove your wraps slowly and carefully. We recommend starting on the cuticle end of each wrap. Begin with your smallest nail and work up to your thumb. As you peel the stickers off apply a little nail polish remover to the edges with a q-tip or cotton ball to help dissolve the adhesive. After removal wash your hands and apply a lotion and cuticle oil to keep your nails happy and healthy. +++ To top coat or not to top coat? You can certainly skip the top coat and have a designer manicure in minutes, but a good top coat will prolong the life of your manicure and give you the feel of glossy nail polish. If you opt for the top we have some tips: * Choose a quality, slow-drying top coat. We love Sally Hansen Miracle Gel. OPI top coat is also a good option. * You donโ€™t have to stick with gloss - matte top coats look great too! * Quick-dry top coats can make the wraps more brittle and increase the chance that they will chip like traditional polish. * Our favorite strategy to prolong wear is to brush on a layer of top coat, then after a few days refresh your manicure by trimming, filling, and re-applying the top coat.

Shipping

U.S. Shipping cost is $2-$3. Orders ship in 1-2 business days via USPS from Wisconsin.

How to use

See our Tips and Tricks page to learn more.

1. Wash hands with soap and water, then use alcohol wipe (included) to cleanse and remove oils from nails.

2. Remove clear cover from nail wraps.

3. Select sticker size and shape that will best fit your nail. Sticker width should be just slightly smaller than nail.

4. Peel sticker from backing paper.

5. Align sticker to your nail. Press firmly and smooth out. Wraps can be stretched slightly to fit. Fold exess over edge of nail.

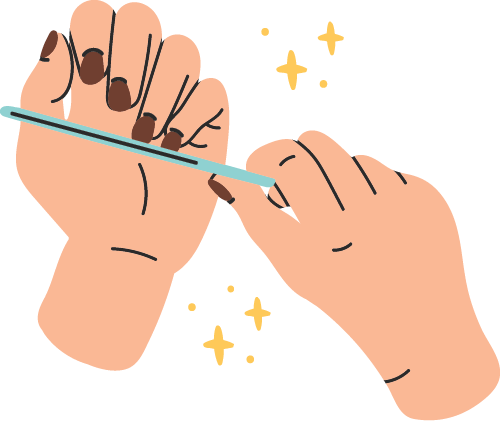
6. Remove excess by filing edge in a downward motion with nail file (included).

7. To increase wearability wait a couple hours for the wraps to properly adhere, then apply a high-quality nail polish top coat.

Ingredients

Styrene/Isoprene Copolymer
(25038-32-8), Hydrogenated Poly(C6-20 Olefin)
(69430-35-9), N-Butyl Acetate (123-86-4),
Polyacrylic acid (9003-01-4), Ethyl Acetate
(141-78-6), Nitrocellulose (9004-70-0),
Dipentaerythrityl Hexaacrylate (26570-58-9),
Hydroxypropl Methacrylate (27813-02-1).

View full details
  • easy to apply

    You now have time for amazing nails.

  • long-lasting

    7-10 days with proper application

  • zero dry time

    Press, file, glow.

  • mess-free

    ย  ย Perfect for on-the-go

1 of 4